


Log in
Latest topics
Who is online?
In total there are 15 users online :: 0 Registered, 0 Hidden and 15 Guests :: 2 BotsNone
Most users ever online was 306 on Fri Sep 17, 2021 9:36 pm
Top posting users this week
| No user |

How to: __________ (tutorials)
+5
Maddy
Britney
Ladonna--♥
Holly✿
AlexisBearPaw8
9 posters
Page 1 of 1

How to: __________ (tutorials)
![]() by AlexisBearPaw8 Thu Jan 16, 2014 2:44 pm
by AlexisBearPaw8 Thu Jan 16, 2014 2:44 pm
This is a how to thread.
Request any recipes or styles of things you would like to learn.
Tutorials:
How to do a waterfall braid:
What you'll need:
- Bobby pins
Step 1: Prep hair by curling with an iron if you want the option of soft curls. Then, leave the front pieces out (1/2 inch to an inch in front on each side).
Step 2: Begin braiding on your right side. For the first section, split into three (like a normal braid). Cross the right side over the middle and then cross the left section in, but instead of threading the left through, just drop it down so it "waterfalls."
Step 3: For the next piece, add in your left section and your center section and then drop out your right section, ( It's like French braiding, but leaving a strand to fall each time).
Step 4: Continue down the side of your head dropping pieces out.
Step 5: Repeat on the opposite side and secure both ends by criss-crossing bobby pins together
at the back of the head.
 (For those of you who don't know the specific name of these "bobby pins," they look like this)
Step 7: Show off your braid! It doesn't have to be perfect, it's probably
your first time doing it!(:

Thanks for reading this tutorial, I hope it helped!
~~~~~~~~~~~~~~~~~~~~~~~~~~~~~~~~~~~~~~~~~~~~~~~~~~~~~~~~~~
How to do a perfect high ponytail:
What you'll need:
- Hair Elastic/Tie
- Bobby Pin
- Hairspray
- Hairbrush
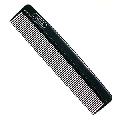
- Fine-tooth Comb, it should look like this:
- Toothbrush
Step 1: Give your hair some texture. If your hair is freshly washed and a little too smooth, add some hairspray or dry shampoo to your hair for some texture. This will allow your ponytail to stay in place all day long.
Step 2: Next, pull your hair up towards the crown of your head. Make sure you’re pulling your hair up, not back.
Step 3: Holding the ponytail in place with one hand, brush out any bumps with the other hand to ensure a smooth, sleek ponytail.
Step 4: Once you have found the perfect ponytail placement (center of your head, visible from the front), it’s time to take your hair elastic and secure the pony into place.
Step 5: To keep your ponytail looking elegant/stylish, take a 1-inch section of hair from the underside of your ponytail and wrap it around the hair elastic. Secure the hair with a bobby pin to hide the elastic, pushing the bobby pin in on the underside of the hair elastic so everything is covered up.
Step 6: For some added volume and texture, tease the ponytail with a fine-tooth comb, gently combing hair upwards and towards the front.
Step 7: Spray a toothbrush with hairspray and brush down any flyaways. This way, you tame your hair without making it completely flat.

Thanks for reading, I hope you now have a perfect high ponytail!
~~~~~~~~~~~~~~~~~~~~~~~~~~~~~~~~~~~~~~~~~~~~~~~~~~~~~~~~~~~
How to make Lemon Meringue Pie:
What you'll need:
For the crust:
- 1¼ cup flour + more for rolling
- 1/2 tsp salt
- 1/2 tsp sugar
- 1 stick (8 tbsp) unsalted butter, diced
- 2 tbsp ice water + more if needed
- Secret ingredient: 1 tsp cider vinegar (helps prevent the formation of gluten, which can make for a tough crust)
For the lemon curd (filling):
- 1 cup sugar
- 1/4 cup + 1 tbsp cornstarch
- 1/4 tsp salt
- 4 large egg yolks (save the whites for the meringue)
- 3/4 cup fresh lemon juice
- 2 cups cold water
- 1½ tsp lemon zest
- 5 tbsp unsalted butter, cut into tablespoons
For the meringue:
- 4 egg whites
- 1/4 tsp salt
- 1/2 cup sugar
Directions:
For the crust:
In a food processor, pulse flour, salt and sugar until well combined. Add cold diced butter and pulse until mixture resembles coarse meal, with pea-sized pieces of butter distributed throughout. If the butter starts to feel too soft, stop what you are doing and freeze the ingredients again.
Sprinkle with 2 tbsp ice water and 1 tsp cider vinegar. Pulse until dough is crumbly, but holds together when squeezed, being sure to pulse and handle the dough as little as possible. Dough should be dry, but if it is not staying together, add up to 2 tbsp more water. Form dough into a 3/4-inch thick disk and wrap tightly with plastic wrap. Chill in the fridge for at least 1 hour before rolling it out. This will allow the gluten to rest and moisture to be drawn into the dough.
Working on a well-floured surface or floured wax-paper, roll out dough to a 14-inch round. Dust off excess flour. Wrap the dough around rolling pin and carefully unroll over a 9-inch baking pan. Gently press into bottom and sides to fit pan. Trim over-hang to 1 inch and fold it under itself. Pinch edges to form a crimp all around.
Chill for another hour before baking. This will ensure the dough will hold its shape and shrink less when baking.
When ready to bake, cover with parchment paper, fill with pie weights or dried beans and bake at 350 degrees until lightly browned, about 45 minutes. Set aside to cool.
For the lemon curd:
In a medium saucepan, combine the sugar, cornstarch, salt, egg yolks, and lemon juice. Whisk in the cold water and cook over medium-high heat, mixing until the mixture comes to a boil. Boil, stirring, for 1 minute before removing from heat and adding lemon zest and butter. Stir until butter is melted. Pour the filling into the cooled pie crust, cover with wax paper, and let cool to room temperature. Alternative, you can chill in the refrigerator for up to 1 day before baking.
For the meringue:
In a large stainless steel bowl, beat the egg whites and salt until soft peaks form. Slowly add in sugar and beat until stiff and glossy peaks form.
To finish the pie:
While making the meringue, preheat oven to 350 degrees and position a rack in the upper third of oven. Remove the wax paper from the filling and scrape the meringue onto the pie. Gently spread over the filling all the way to the inner edge of the crust. Use the back of a spoon to make decorative swirls and peaks.
Bake the pie for about 7 minutes or until the meringue is just golden brown. Transfer to a wire rack to cool to room temperature, then refrigerate until chilled, about 3 hours.
And ta dah, you're done! Enjoy your yummy Lemon Pie!

~~~~~~~~~~~~~~~~~~~~~~~~~~~~~~~~~~~~~~~~~~~~~~~~~~~
How to make Rocky Road Pie:
What you'll need:
- 1-1/4 cups buttermilk baking mix
- 1/4 cup unsalted butter, softened
- 2 Tbs. sugar
- 2 Tbs. boiling water
- 1/3 cup plus 2 Tbs. roasted salted peanuts, chopped
- 1/2 cup peanut butter
- 1 cup semisweet chocolate chips
- 1-1/2 cups mini marshmallows
- 4-1/2 cups vanilla or chocolate ice cream
Prepare pie shell: Preheat oven to 450°F. Combine first 4 ingredients and 1/3 cup chopped peanuts in a bowl. Stir vigorously until a soft dough forms. Press dough firmly with floured fingers in an ungreased 10 inch pie plate, bringing dough onto rim of plate. Flute edges if desired. Cover edge with aluminum foil, if desired, to prevent excessive browning. Bake 8-10 minutes, until light brown. Cool.
Heat peanut butter and chocolate chips in a saucepan over low heat, stirring constantly, just until chocolate is melted. Remove from heat. Fold in marshmallows. Cool 10 minutes. Spoon and spread 1/2 cup marshmallow mixture in pie shell. Lightly pack half the ice cream into pie shell. Spoon about half the remaining marshmallow mixture by teaspoonfuls onto ice cream. Spoon remaining ice cream into pie shell. Spoon remaining marshmallow mixture on top. Sprinkle with 2 Tbs. chopped peanuts. Cover and freeze at least 8 hours, until firm. Remove from freezer 15-20 minutes before cutting.
This recipe serves 12 people. Due to the nature of this recipe, it adjusts the number of servings in multiples of 12 only.
Enjoy your pie!

~~~~~~~~~~~~~~~~~~~~~~~~~~~~~~~~~~~~~~~~~~~~~~~~~
How to make homemade bows out of cloth:
What you'll need:
- Scrap fabric
- Basic sewing supplies
- Glue gun
- Hair clip
Step 1: Begin by cutting out a 5”x7” piece of fabric
Step 2: Fold it in half on the long side, right sides together. So now the piece is 3.5”x5”. Press.
Step 3: Stitch a ¼” seam and turn right side out
Step 4: Press so the seam is in the center of the back
Step 5: Take each end and turn the raw edges in. Pin in place.
Step 6: Edge stitch each side as close to the edge as possible using a complimentary thread
Step 7: Take one piece and grab it in the center and fold it accordion style until all the fabric is gathered together in the center:
 (This is the accordion style fold)
Step 8: Place the gathered piece and place under your presser foot, making sure even on the sides. (presser foot)

Step 9: Sew a zig-zag stitch and backstitch several times to secure
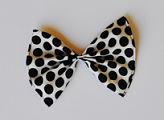
Your bow should look like this, enjoy!
~~~~~~~~~~~~~~~~~~~~~~~~~~~~~~~~~~~~~~~~~~~~~~~
Last edited by ❄Lexi❄ on Fri Jan 17, 2014 12:00 pm; edited 5 times in total

AlexisBearPaw8- Admin

- Posts : 3714
BearCoins : 621
Join date : 2012-07-24
Location : Equestria
Re: How to: __________ (tutorials)
![]() by Holly✿ Thu Jan 16, 2014 3:11 pm
by Holly✿ Thu Jan 16, 2014 3:11 pm
Thank you so much for posting (: The hairstyles are so cute <333

Holly✿- The Bearville Mascot
- Posts : 4700
BearCoins : 212
Join date : 2013-05-30
Re: How to: __________ (tutorials)
![]() by Ladonna--♥ Fri Jan 17, 2014 2:49 am
by Ladonna--♥ Fri Jan 17, 2014 2:49 am
Amazing! I'll definitely try the hairstyles out, thank you so much for posting! ☺

Ladonna--♥- Friendly folk
- Posts : 78
BearCoins : 80
Join date : 2013-12-04
Location : Hogwarts♥
Re: How to: __________ (tutorials)
![]() by Britney Fri Jan 17, 2014 12:09 pm
by Britney Fri Jan 17, 2014 12:09 pm
Amazing Lexi.
I hope to see more as I really want to try and do some of these hair styles for my graduation.
Could u maybe do a formal one?
I hope to see more as I really want to try and do some of these hair styles for my graduation.
Could u maybe do a formal one?

Britney- The Bearville Mascot
- Posts : 3144
BearCoins : 601
Join date : 2012-11-12
Re: How to: __________ (tutorials)
![]() by Maddy Fri Jan 17, 2014 12:53 pm
by Maddy Fri Jan 17, 2014 12:53 pm
Amazing! Thanks for doing the rocky road pie!!

Maddy- Friendly folk
- Posts : 140
BearCoins : 14
Join date : 2012-11-22 -

Re: How to: __________ (tutorials)
![]() by AliApple Fri Jan 17, 2014 1:10 pm
by AliApple Fri Jan 17, 2014 1:10 pm
Whooaa this is really nice! I might try the bow one(: I have friends at school who make and sell them

AliApple- Royal bear
- Posts : 568
BearCoins : 1098
Join date : 2014-01-11
Location : Cali -
Re: How to: __________ (tutorials)
![]() by xxBellaxx Fri Jan 17, 2014 1:16 pm
by xxBellaxx Fri Jan 17, 2014 1:16 pm
Wow. I Know how to do a waterfall braid! c:

xxBellaxx- Royal bear
- Posts : 584
BearCoins : 345
Join date : 2014-01-05
Location : Florida ^-^
Re: How to: __________ (tutorials)
![]() by Holly✿ Fri Jan 17, 2014 1:17 pm
by Holly✿ Fri Jan 17, 2014 1:17 pm
Thank you so much for posting! (: The bows are soo cute and the pie looks delicious
Holly✿- The Bearville Mascot
- Posts : 4700
BearCoins : 212
Join date : 2013-05-30
Re: How to: __________ (tutorials)
![]() by ★Mαᴙιηα★ Sun Jan 19, 2014 9:16 pm
by ★Mαᴙιηα★ Sun Jan 19, 2014 9:16 pm
Whoa, these are really informative and helpful!
Thanks for posting, Lexi
Thanks for posting, Lexi

★Mαᴙιηα★- Friendly folk
- Posts : 116
BearCoins : 116
Join date : 2014-01-05
Location : somewhere
Re: How to: __________ (tutorials)
![]() by Lauren♥ Thu Jan 23, 2014 8:06 am
by Lauren♥ Thu Jan 23, 2014 8:06 am
This is really helpful for anyone that needs help with anything.
Thanks for posting! c:
Thanks for posting! c:

Lauren♥- Friendly folk
- Posts : 29
BearCoins : 29
Join date : 2014-01-21
Page 1 of 1
Permissions in this forum:
You cannot reply to topics in this forum|
|
|
» howdy folks
» DING DONG BUDS!
» hello old friends
» If anyone reads this..
» Hi Everyone! Lexi Here c:
» I FOUND A NEW BEARVILLE!
» What's next of Bearville?
» Play.Build a bear